Knitting Gauge: How to Knit and Measure a Gauge Swatch
Find out what knitting gauge means, how to knit a swatch big enough to measure, how to count stitches and rows over 4 inches, and which way to change needle size when your numbers are off.
Tutorial at a glance
Materials
- The yarn chosen for your project
- The needles chosen for your project
- Stiff ruler or needle gauge
- Two pins
- Scissors
Knitting gauge is the number of stitches and rows that fit into a set measurement of fabric, almost always 4 inches (10 cm). It is the link between the numbers in a pattern and the actual size of the thing you make.
A gauge swatch is a small test square you knit and measure before starting a project. It takes less than an hour and tells you whether your finished piece will come out the size the pattern promises.
Why gauge matters
Two people can use the same yarn and the same needles and still make stitches of different sizes, because everyone holds the yarn a little differently. A pattern is written for one particular stitch size. If yours is different, every measurement shifts.
Here is the arithmetic. Suppose a pattern lists a gauge of 18 stitches to 4 inches, which is 4.5 stitches per inch, and tells you to cast on 90 stitches. That gives a piece 20 inches (51 cm) wide. If you knit more tightly and get 20 stitches to 4 inches, the same 90 stitches come out only 18 inches (46 cm) wide. A difference of half a stitch per inch has cost you 2 inches.
When you can relax about it
For a scarf, a dishcloth or a blanket, exact size is not critical. A scarf that is a little wider or narrower still works. Gauge does still affect how much yarn you use and how the fabric feels, so a quick swatch is never wasted.
For anything that has to fit a body, such as a hat, a headband, mittens or a sweater, always swatch.
Where to find the gauge you are aiming for
Every pattern states its gauge near the top, in a line such as “18 sts and 24 rows = 4 in (10 cm) in stockinette stitch on US 8 (5 mm) needles.” Here “sts” is the abbreviation for stitches. If that line is new to you, the guide to how to read a knitting pattern walks through each part.
Yarn labels list a gauge too. Worsted-weight (#4) yarn typically gives 16 to 20 stitches per 4 inches on US 7 to 9 (4.5 to 5.5 mm) needles. Bulky (#5) yarn gives 12 to 15 stitches on US 9 to 11 (5.5 to 8 mm). The label’s gauge is a general guide; the pattern’s gauge is the one to match.
How to knit a gauge swatch
Use the exact yarn and needles you plan to use for the project, and work in the stitch pattern the gauge line names. That is usually stockinette stitch. The swatch must be at least 5 to 6 inches (13 to 15 cm) wide so you can measure in the middle, away from the edges. The example below is for worsted yarn.
- Cast on 30 stitches.
- Knit 4 rows. This garter-stitch border keeps the bottom edge from curling.
- Next row, right side (RS): knit every stitch.
- Next row, wrong side (WS): knit 3, purl until 3 stitches remain, knit 3. The three knit stitches at each end make a flat side border.
- Repeat steps 3 and 4 until the swatch is about 5.5 inches (14 cm) tall.
- Knit 4 rows, then bind off loosely.
Knit the way you normally do. A swatch worked with extra care does not show how your project will really turn out.
Tip
Wash and dry the swatch the way you will care for the finished item, then let it rest flat before you measure. Many yarns relax or tighten slightly after their first wash, and it is better to find that out on a small square.
How to measure gauge
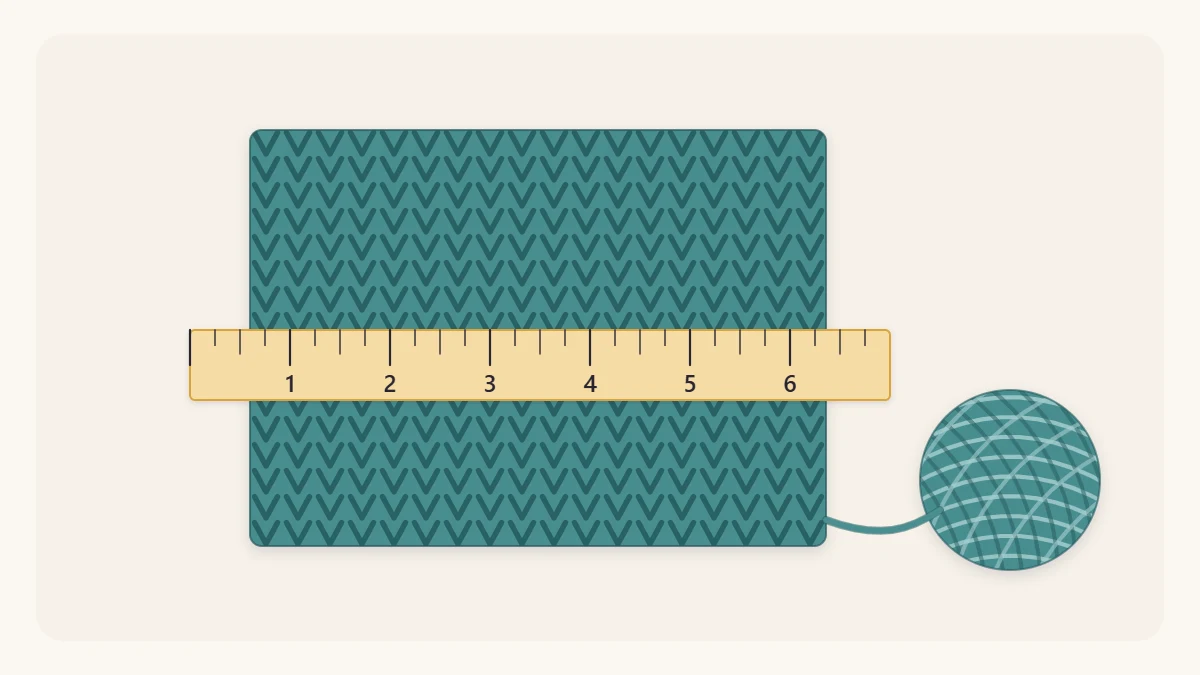
- Lay the swatch on a hard, flat surface. Smooth it out, but do not stretch it.
- Place a ruler across the stockinette center, well inside the borders. A stiff ruler is easier to keep straight than a tape measure.
- Mark the 0 and 4 inch (10 cm) points with two pins.
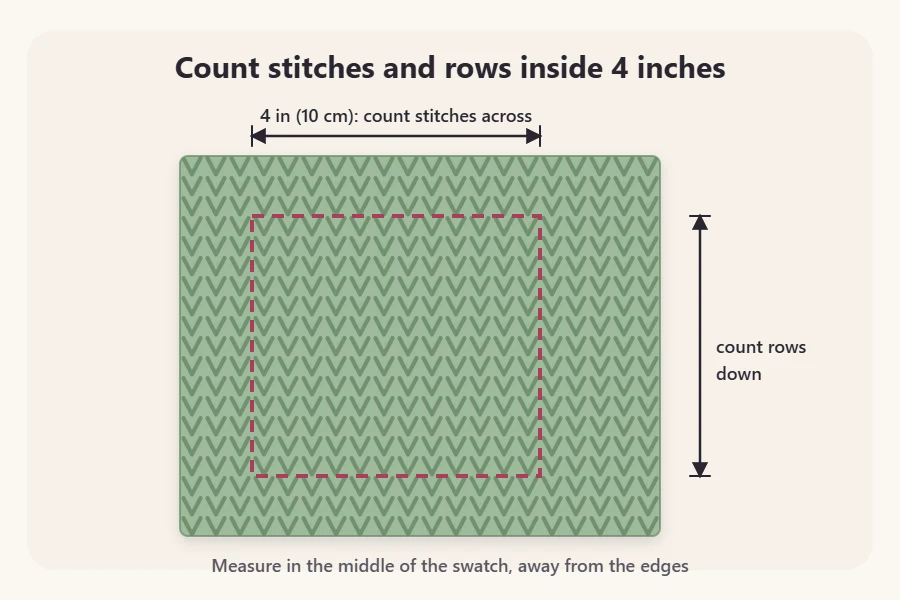
- Count the stitches between the pins. On the right side each stitch looks like a V. Count half stitches too.
- Turn the ruler to run up and down, mark 4 inches again, and count the rows. Each V stacked on top of another is one row.
- Measure in a second spot and compare. If the numbers disagree, take the average.
What to do if your gauge is off
Change the needle size, not the way you knit. Forcing yourself to knit tighter or looser rarely lasts beyond a few rows.
- Too many stitches in 4 inches: your stitches are too small. Go up one needle size, for example from US 8 (5 mm) to US 9 (5.5 mm).
- Too few stitches in 4 inches: your stitches are too large. Go down one size, for example from US 8 (5 mm) to US 7 (4.5 mm).
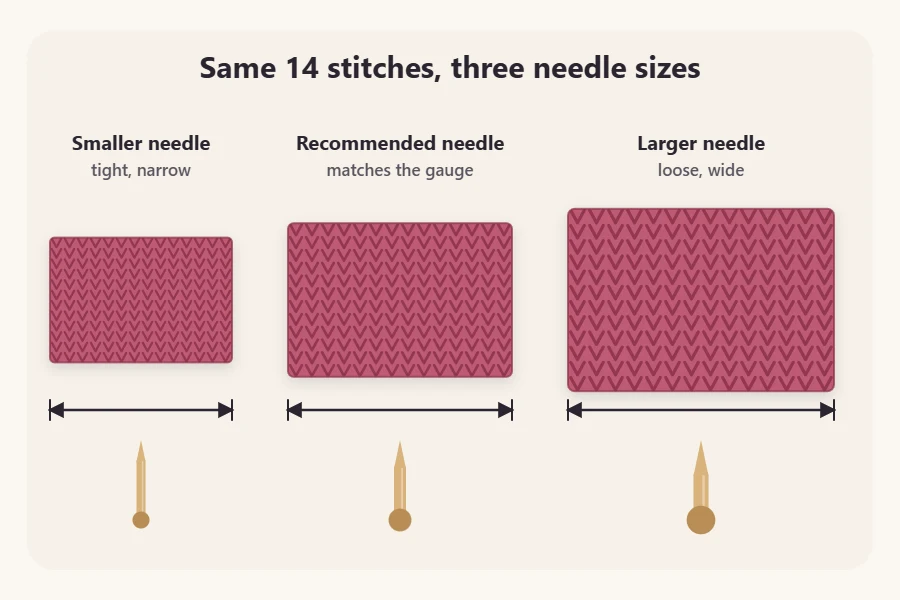
Then knit a new swatch with the new needles and measure again. It can take two or three tries. The needle size printed in the pattern is only the size the designer needed; the right size for you is whichever one gives the stated gauge.
Needle material can shift things slightly as well, so swatch with the actual pair you will use. The guide to knitting needles for beginners covers the differences.
Stitch gauge and row gauge
Sometimes the stitch count matches and the row count does not. For most beginner patterns, stitch gauge matters more, because it controls width, and length is usually given as a measurement: “knit until the piece is 10 inches long.” You simply knit a few more or fewer rows.
If your swatch looks uneven, with stitches of mixed sizes, measuring will be unreliable. That is a question of how you hold the yarn rather than of needle size, and the guide to knitting tension deals with it.
Keep your swatches
Pin a note to each swatch with the yarn, the needle size and the gauge you measured. Over time you will learn whether you tend to knit tightly or loosely, which makes choosing a starting needle much quicker.
Frequently asked questions
Do I really need to knit a gauge swatch?
For anything that has to fit, such as a hat, headband or sweater, yes. A small difference in stitch size adds up to inches across a whole piece. For scarves, dishcloths and blankets the size is flexible, so a swatch is optional, though it still shows how much yarn you might use.
How big should a gauge swatch be?
Make it at least 5 to 6 inches wide and about as tall. Edge stitches are distorted, so you need room to measure a full 4 inches in the middle. With worsted-weight yarn that usually means casting on around 30 stitches, including a few border stitches at each side.
My gauge has too many stitches. Do I go up or down a needle size?
Go up. Too many stitches in 4 inches means each stitch is smaller than the pattern expects, and a larger needle makes larger stitches. If you have too few stitches, your stitches are too big, so go down a size. Knit a fresh swatch after each change and measure again.