Knitting Increases for Beginners: KFB, M1 and Yarn Over
Step-by-step instructions for the three increases beginners meet first: knit front and back, make one left and right, and the yarn over, with how each looks and when to use it.
Tutorial at a glance
Materials
- Smooth, light-colored worsted-weight yarn
- US 8 (5 mm) needles
- Stitch markers
- Scissors
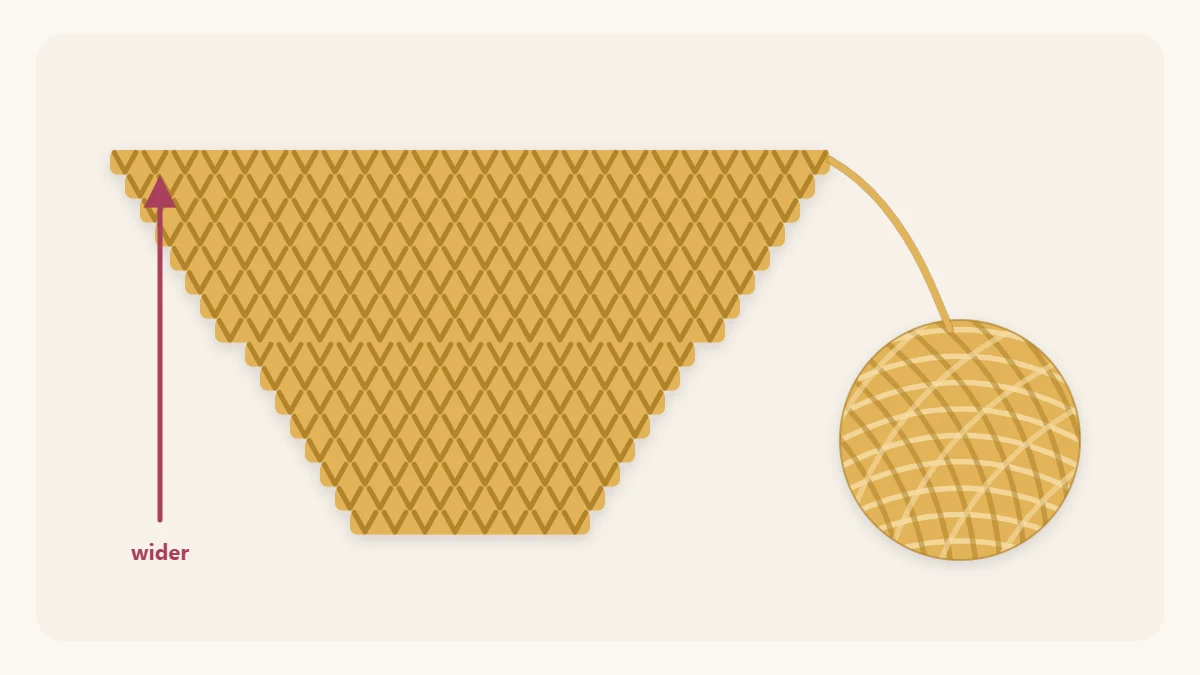
Knitting increases are the moves that add stitches to a row so the fabric gets wider. They shape the thumb of a mitten, the flare of a shawl and the sleeve of a sweater that widens toward the shoulder.
There are many ways to add a stitch, but three cover almost every beginner pattern: knit front and back, make one, and the yarn over. Each adds exactly one stitch, and each looks different in the finished fabric.
The three increases compared
| Increase | Abbreviation | How it looks | Typical use |
|---|---|---|---|
| Knit front and back | kfb | A small purl-like bar | Garter stitch, simple shaping |
| Make one left / right | M1L / M1R | Nearly invisible | Smooth stockinette fabric |
| Yarn over | yo | A small hole | Eyelets and lace |
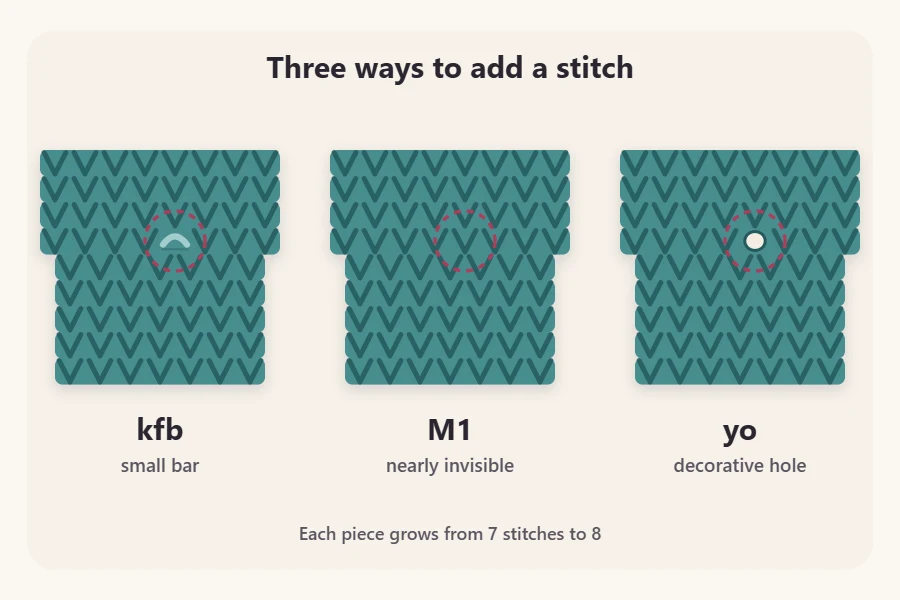
All three build on the ordinary knit stitch, so be comfortable with the knit stitch before you begin. For practice, use smooth worsted-weight (#4) yarn in a light color and US 8 (5 mm) needles.
Knit front and back (kfb)
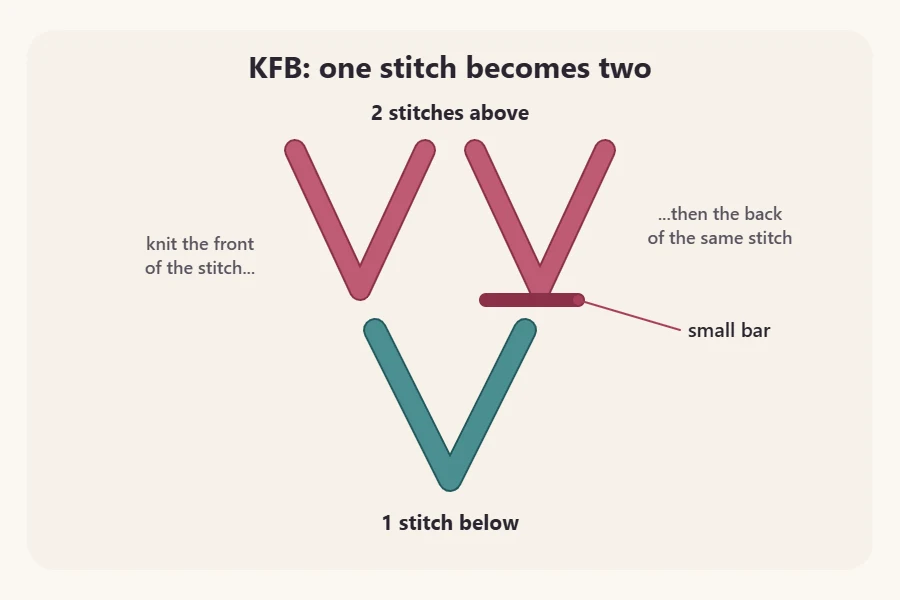
Kfb turns one stitch into two by knitting into it twice. It is the easiest increase to learn. Each stitch on your needle has a front leg, on the side facing you, and a back leg behind the needle.
- Knit into the stitch as usual, with the yarn in back: insert the right needle, wrap, and pull the new loop through. Do not slide the old stitch off the left needle.
- Swing the tip of the right needle around behind the left needle and insert it into the back leg of that same stitch, from right to left.
- Wrap the yarn counterclockwise and pull a second loop through.
- Now slide the old stitch off the left needle.
You have two stitches on the right needle where there was one. The second has a small horizontal bar at its base that looks like a purl bump. In garter stitch the bar disappears among the ridges. In stockinette it shows, which is why some patterns choose a different increase.
Make one (M1L and M1R)
A make one creates a stitch from the horizontal strand of yarn that runs between two stitches. Because it uses that strand rather than an existing stitch, nothing on the left needle is used up. The strand is lifted onto the needle and knit twisted, which closes the gap and makes the increase almost invisible.
M1L (make one left)
- Work to the place where the increase goes. Gently pull the needle tips apart to find the strand running between them.
- With the left needle, lift that strand from front to back.
- Knit it through the back loop: insert the right needle into the leg behind the left needle, from right to left, wrap and pull through.
M1R (make one right)
- With the left needle, lift the strand from back to front.
- Knit it through the front loop, as you would an ordinary stitch. It will feel tight; that is normal.
M1L slants to the left and M1R slants to the right. Patterns often use one at each side of a piece so the two edges mirror each other. If a pattern just says “M1,” use M1L unless it says otherwise.
Watch out
If your make one leaves a hole, the strand was not twisted. Check the direction you lifted it and which loop you knit into: front to back and back loop for M1L, back to front and front loop for M1R.
Yarn over (yo)
A yarn over is simply an extra wrap of yarn over the right needle. It is the quickest increase and the only one meant to leave a hole.
- Between two knit stitches, bring the working yarn forward between the needle tips to the front.
- Knit the next stitch. As you do, the yarn travels over the top of the right needle to the back, leaving an extra loop on the needle.
- On the following row, knit or purl that loop like any other stitch.
The result is a neat round eyelet. Lace patterns usually pair each yarn over with a decrease so the stitch count stays the same; you can read about those in knitting decreases for beginners.
A yarn over made by accident is one of the most common reasons a beginner’s knitting grows wider. If you find a surprise hole and an extra stitch, see common knitting mistakes.
How increases change your stitch count
Every increase adds one stitch, but they are counted differently when you read a row.
- Kfb uses one stitch from the left needle and leaves two on the right.
- M1L, M1R and yo use no stitches from the left needle and leave one on the right.
So “k1, kfb” works across two stitches and gives three, while “k1, M1L” works across one stitch and gives two. Here “k1” means knit one stitch. Count your stitches at the end of every increase row. A set of stitch markers placed beside each increase point also helps you keep your place.
Where to place increases
Increases worked in the very first or last stitch of a row make a bumpy edge that is hard to seam. Placing them one or two stitches in from the edge gives a cleaner line.
Most patterns increase on right side (RS) rows only and work the wrong side (WS) rows plain. That spaces the increases out and creates a gradual slope.
A practice swatch
This small triangle-shaped swatch lets you practice kfb at both edges. “Sts” means stitches.
- Cast on 10 sts.
- Row 1 (RS): k1, kfb, knit until 3 sts remain, kfb, k2. You have added 2 sts.
- Row 2 (WS): purl every stitch.
- Repeat rows 1 and 2 four more times. You should have 20 sts.
- Bind off.
The row ends with k2 rather than k1 on purpose. A kfb puts its bar to the left of the stitch it was worked into, so this keeps two plain stitches outside the bar at each edge.
Then knit the swatch again, replacing the increases: k2, M1L, knit until 2 sts remain, M1R, k2. Compare the two side by side to see which you would choose for smooth fabric.
Frequently asked questions
Which knitting increase is easiest for beginners?
Knit front and back, or kfb, is usually the first one taught. You knit into the same stitch twice, once through the front leg and once through the back, so there is no strand to find or lift. It leaves a small bar, which blends into garter stitch.
What is the difference between M1L and M1R?
Both lift the strand between two stitches and knit it twisted. For M1L you lift the strand from front to back and knit through the back loop, and the new stitch slants left. For M1R you lift from back to front and knit through the front loop, and it slants right.
Why does my increase leave a hole?
A yarn over is meant to leave a hole, so if you want solid fabric choose a different increase. With a make one, a hole means the lifted strand was knit without being twisted. Lift it in the correct direction and knit into the loop that feels tight.


