Easy Knit Headband Pattern in 2×2 Rib
Knit a stretchy 2x2 rib headband flat on two needles, then seam it into a loop. Includes how to measure your head, the full row-by-row pattern, binding off in pattern and simple size changes.

Tutorial at a glance
Materials
- About 60-70 yd worsted-weight yarn
- US 8 (5 mm) needles
- Tapestry needle
- Scissors
- Tape measure
An easy knit headband pattern is a smart next step once you can knit and purl. It is small, it uses less than one ball of yarn, and it teaches ribbing, the stretchy fabric you will meet again on hat brims, cuffs and sweater hems. This one is a flat strip of 2×2 rib that you seam into a loop, so there is no shaping and no knitting in the round.
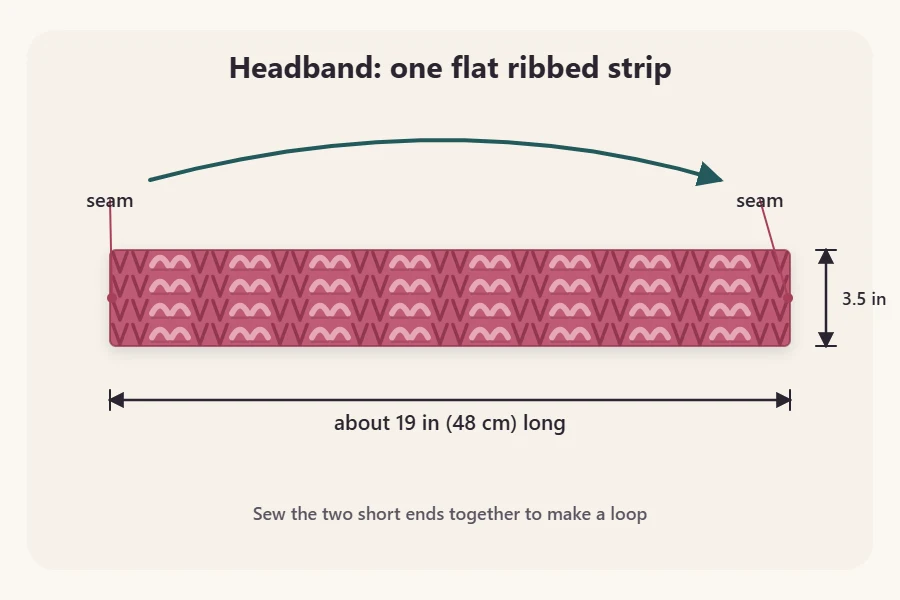
The finished band is about 3.5 inches (9 cm) wide when relaxed and stretches to hug your head and cover your ears.
What you need
- Worsted-weight (medium, #4) yarn, about 60-70 yards. A smooth, light-colored wool or wool blend is easiest to read and has the most spring.
- US 8 (5 mm) knitting needles, either straight needles or a circular needle used flat.
- A tapestry needle for seaming and weaving in ends.
- Scissors and a tape measure.
Exact gauge (the number of stitches per inch) is not critical, because ribbing stretches to fit. If your stitches tend to be very tight or very loose, the band will simply come out a little narrower or wider. A quick gauge swatch is still good practice if you want to know in advance.
Measure your head first
Wrap the tape measure around your head where the band will sit: across the forehead, over the ears and around the back, just above the nape of the neck. Keep the tape snug but not tight, and write the number down.
The strip is knit about 2 inches (5 cm) shorter than that measurement. Because the band is smaller than your head, the rib has to stretch slightly to go on, and that stretch is what keeps it in place. For a 21-inch head, you knit the strip to about 19 inches (48 cm).
Abbreviations used
- CO: cast on
- k: knit
- p: purl
- st(s): stitch(es)
- RS: right side, the side that faces out when the band is worn
- WS: wrong side
- rep: repeat
- BO: bind off
An asterisk marks the start of a group of stitches that you work over and over. “*K2, p2; rep from *” means knit 2, purl 2, then keep doing that pair of actions across the row.
The headband pattern
- CO 18 sts. With the long-tail cast-on, pull out about 24 inches of tail before making your slipknot: roughly 1 inch per stitch plus 6 inches extra.
- Row 1 (RS): *k2, p2; rep from * to last 2 sts, k2.
- Row 2 (WS): *p2, k2; rep from * to last 2 sts, p2.
- Repeat Rows 1 and 2 until the strip measures about 19 inches (48 cm), or about 2 inches less than your head measurement. Lay it flat and do not stretch it when you measure. End after a Row 2.
- BO in pattern, then cut the yarn, leaving a tail of about 12 inches for seaming. Pull the tail through the last loop.
How the 2×2 rib works
Eighteen is a multiple of 4 plus 2. Those 2 extra stitches mean every right-side row both starts and ends with k2, so the two long edges of the band match.
You do not have to memorize which row you are on. Look at the next stitches on the left needle: a stitch with a smooth V at its base is a knit, and a stitch with a small horizontal bump is a purl. In ribbing you knit the knits and purl the purls, which stacks them into columns. The guide to knitting ribbing covers this in more detail.
The yarn has to change position every 2 stitches. It sits in back for knit stitches and in front for purl stitches.
Watch out
Move the yarn between the needle tips, never over the top of the right needle. Carrying it over the needle makes an accidental yarn over: an extra stitch with a hole under it. Count your stitches every few rows. You should always have 18.
Binding off in pattern
“In pattern” means you keep ribbing while you bind off instead of knitting every stitch. Work the first 2 stitches as they appear, lift the first stitch over the second and off the right needle, then work the next stitch as a knit or a purl, whichever it is, and lift over again. Remember to move the yarn to the front before each purl and to the back before each knit.
Keep this edge loose so it stretches as much as the rest of the band. If your bind-off tends to pull tight, hold a needle one or two sizes larger in your right hand for this row. There is a full walkthrough in how to bind off.
Seaming the short ends
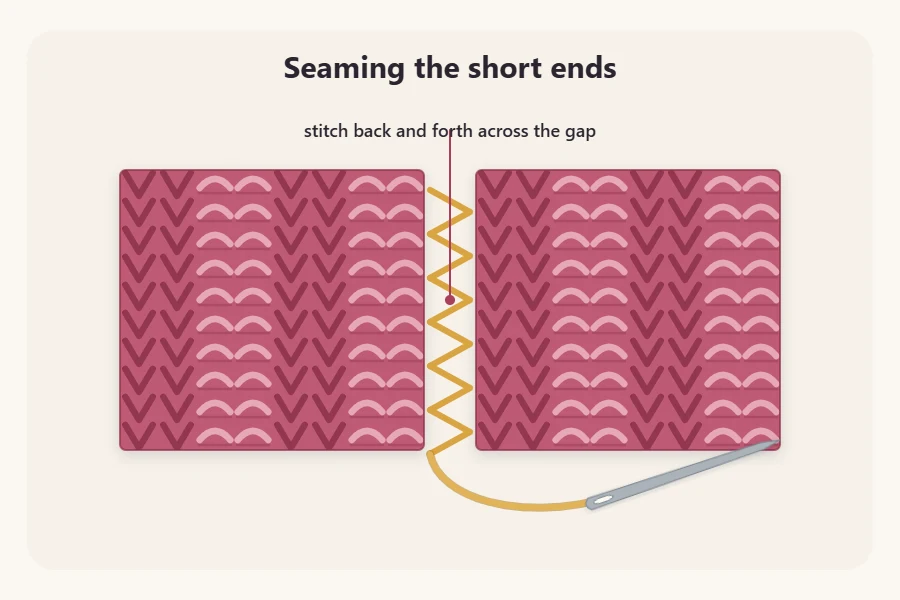
- Fold the strip in half with the right side on the inside so the cast-on edge and the bind-off edge lie together. Check that the strip is not twisted.
- Thread the 12-inch tail onto the tapestry needle.
- Pass the needle through one edge stitch on the cast-on side and the matching stitch on the bind-off side, then pull the yarn snug, but not so tight that it puckers.
- Repeat with the next pair of stitches, working across all 18. Line up knit columns with knit columns as you go.
- Fasten off by running the needle under the last seam stitch twice, then turn the band right side out.
Finish by weaving both tails through the wrong side for about 2 inches, changing direction once, and trimming them close. If you need a refresher, see how to weave in ends. Wear the seam at the back of your head, where it disappears under your hair.
Easy ways to change it
- Wider band: cast on 22 or 26 stitches. Any multiple of 4 plus 2 works with the same two rows. You will need more yarn.
- Narrower band: cast on 14 stitches.
- Child size: knit the strip shorter, again aiming for about 2 inches less than the head measurement.
- Stripes: change color at the start of a right-side row, leaving 6-inch tails of both the old and the new yarn to weave in later.
Frequently asked questions
How long should I knit a headband before seaming it?
Measure around your head where the band will sit, then knit the strip about 2 inches shorter than that number. The ribbing stretches to make up the difference, which is what holds the band in place. For this pattern, a 21-inch head needs a strip of about 19 inches.
Can I knit this headband in the round instead of seaming it?
You can, but it becomes a different project: the stitches would run around the head rather than across the band, and you would need a short circular needle. Knitting it flat and seaming keeps everything on two ordinary needles, which is simpler when you are new to ribbing.
Why does my ribbing have holes and extra stitches?
The usual cause is carrying the yarn over the top of the needle when you switch between knit and purl. That wraps the needle and creates an unplanned yarn over. Bring the yarn between the two needle tips each time, and count your stitches every few rows to catch a mistake early.